Athugið að Forticlient krefst macOS Montery eða nýrri útgáfur af stýrikerfi. Frekari upplýsinar má finna hér
Note that Forticlient requiers macOS Montery or a newer version of OS. Further information can be found here Smelltu hér til að ná í macOS uppsetningarpakkann.
Click the link to download the macOS installer Opnaðu DMG skjalið og ýttu á FortiClientUpdate
Open the DMG file and click FortiClientUpdate 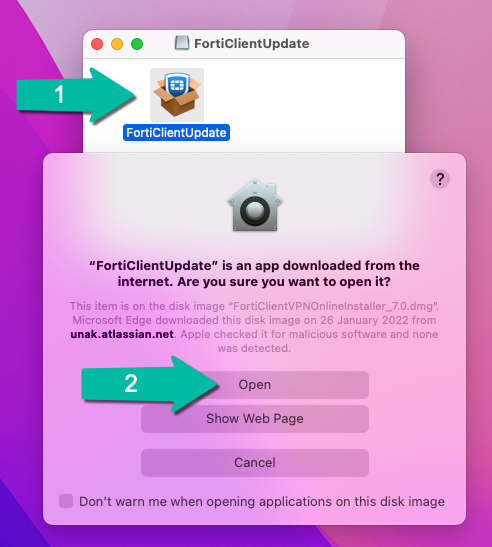 Þá hleðst FortiClient niður á tölvuna
Now FortiClient starts downloading to your computer 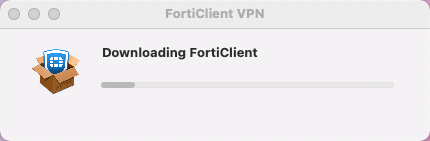 Þegar niðurhalið er búið ýtir þú á Install
When the download is finished click Install 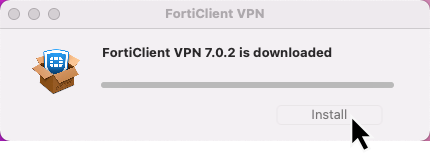 Í lok uppsetningar kemur öryggisgluggi sem spyr hvort þú viljir leyfa FortiTray á tölvunni.
Smella skal á “Allow”
At the end of the install you get a security alert asking if you want to allow FortiTray to run on your computer.
You should click Allow 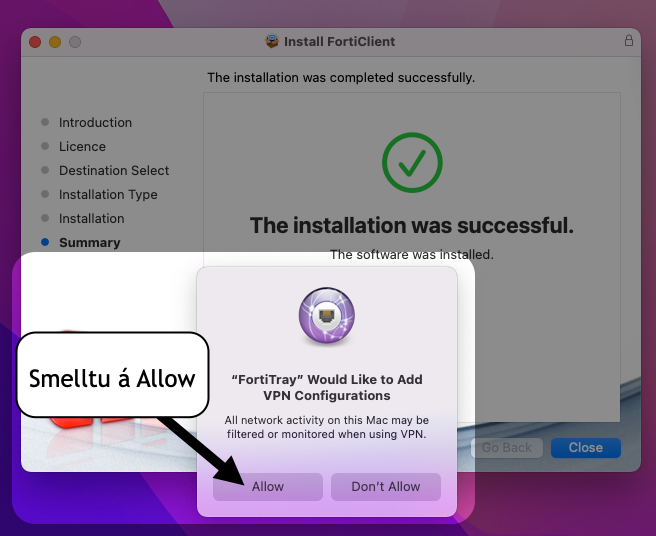 Þegar FortiClient er ræstur í fyrsta skipti þarf að samþykkja þessa skilmála.
When FortiClient is run for the first time you have to agree to these terms and conditions 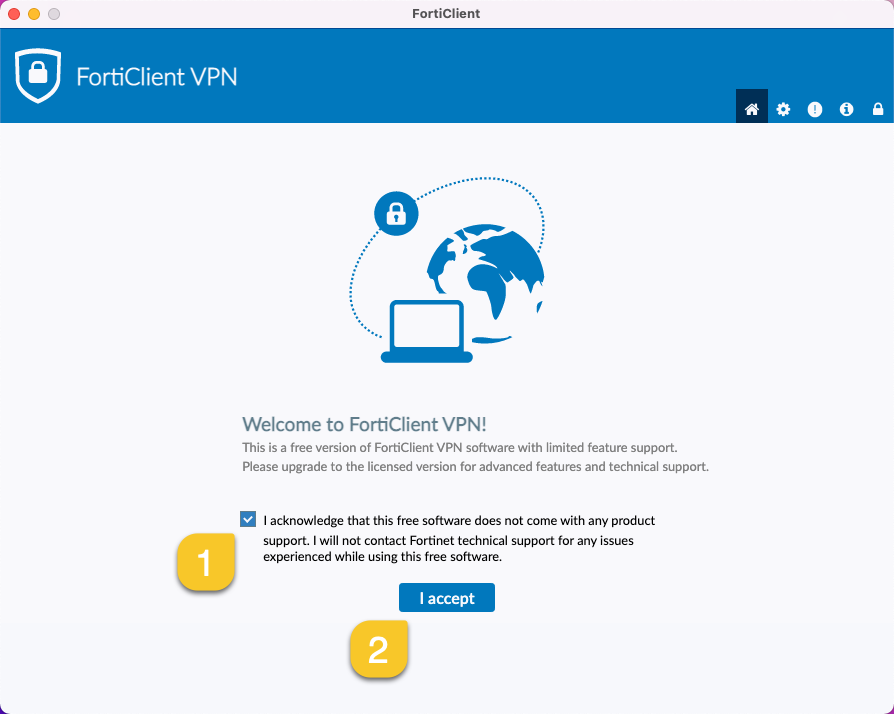 Þá er komið að því að setja stillingarnar inn til þess að geta VPN-tengst.
Now you put in the settings in order to connect to the UNAK VPN
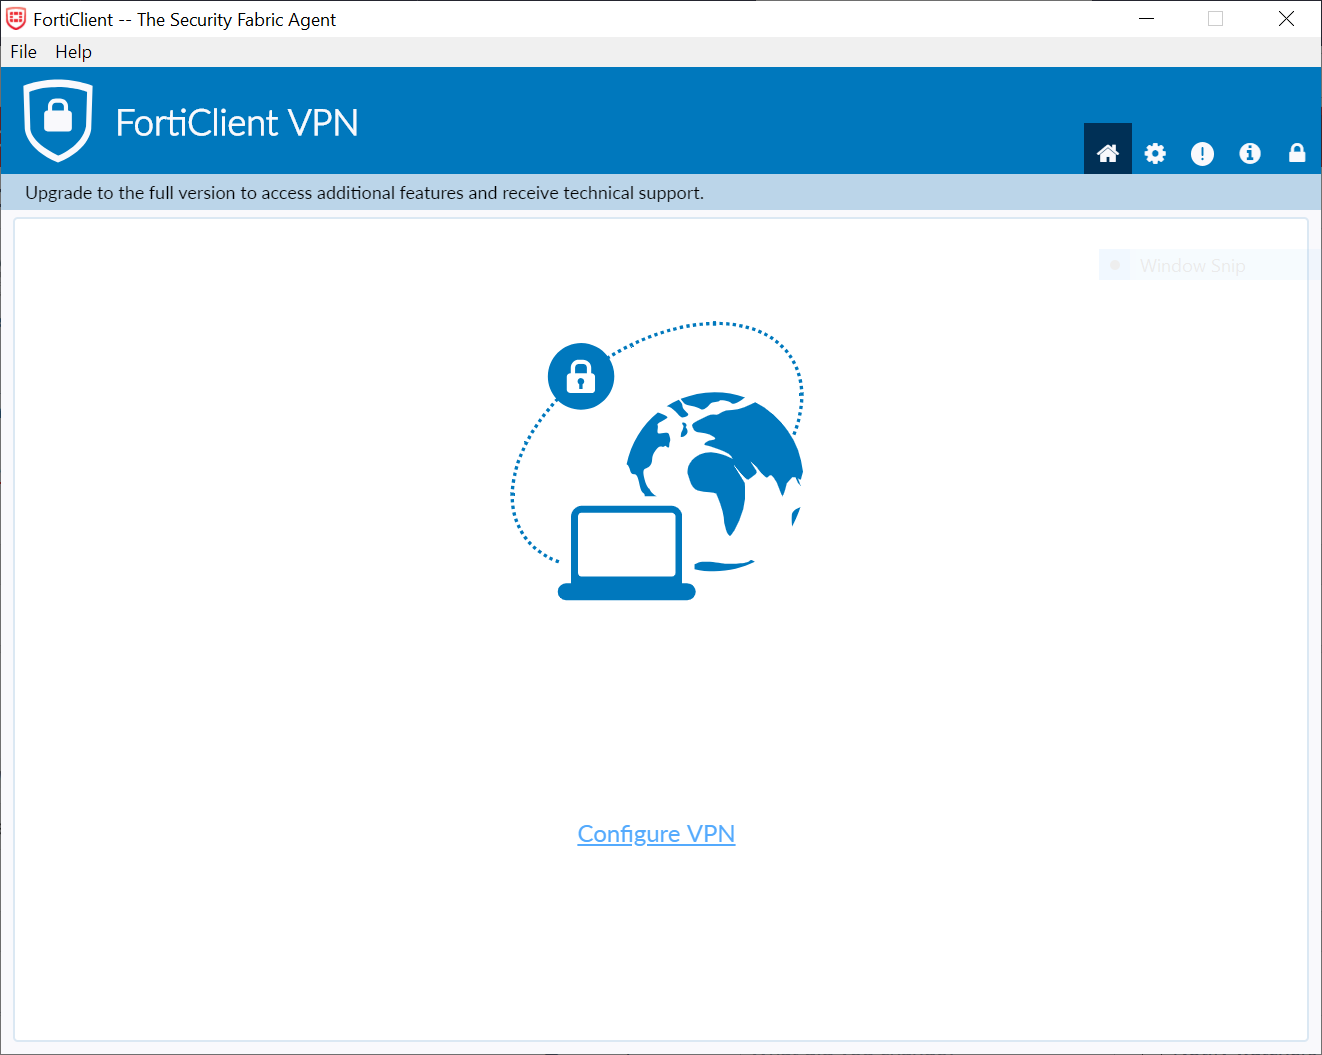
Smelltu á: Configure VPN
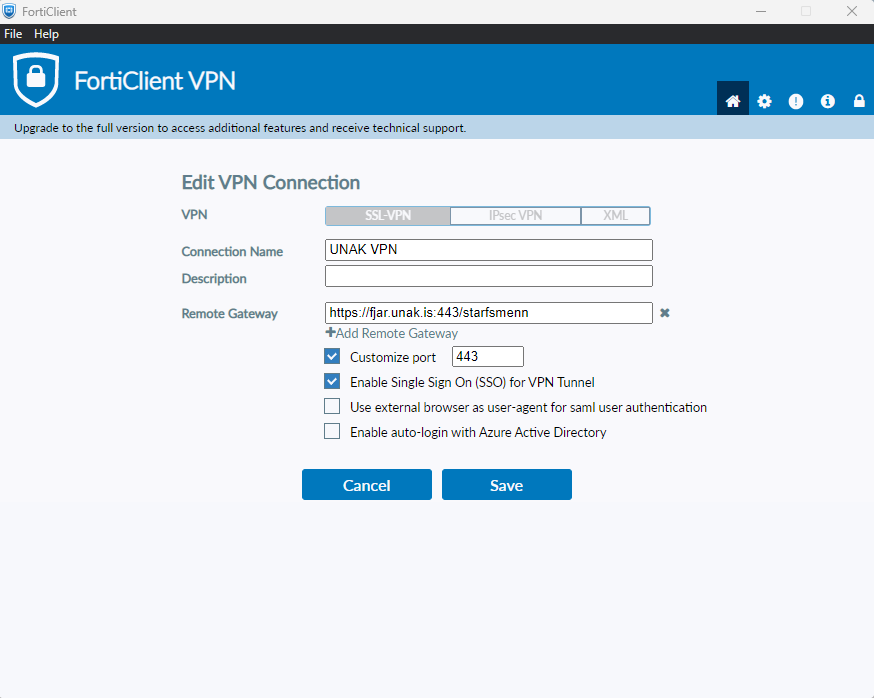
Click: Configure VPN  Connection Name: UNAK VPN
Remote Gateway: https://fjar.unak.is:443/starfsmenn fyrir starfsmenn / for staff
https://fjar.unak.is:443/nemendur fyrir nemendur / for students
Customize port : Haka í og setja 443 ef það er ekkert þar / check and type in 443 if it doesn’t fill automatically
Haka í “Enable Single Sign On (SSO) for VPN Tunnel”/ Check “Enable Single Sign On (SSO) for VPN Tunnel” 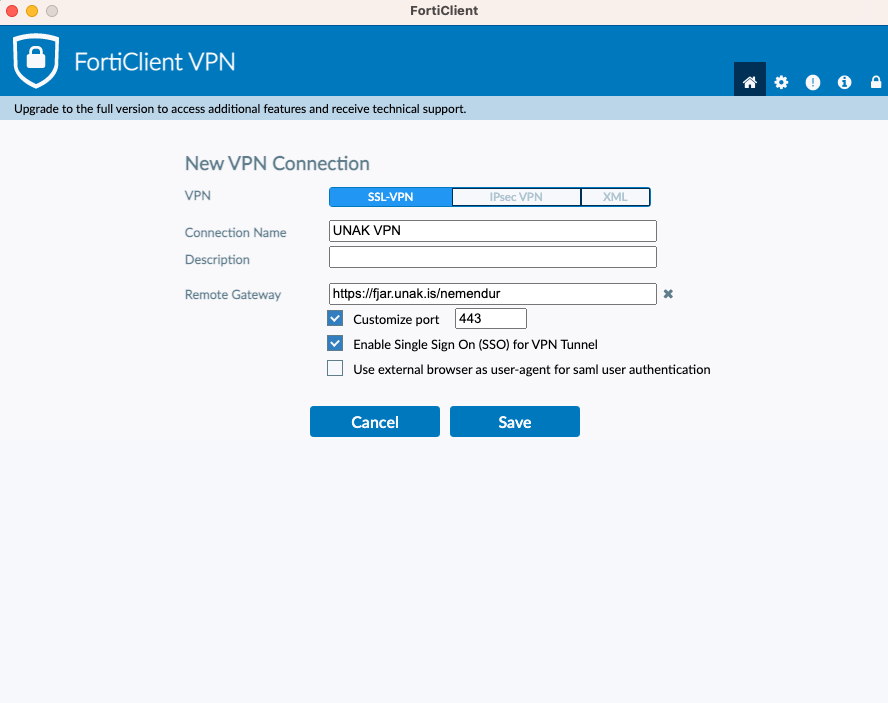 Næst er ýtt á Save
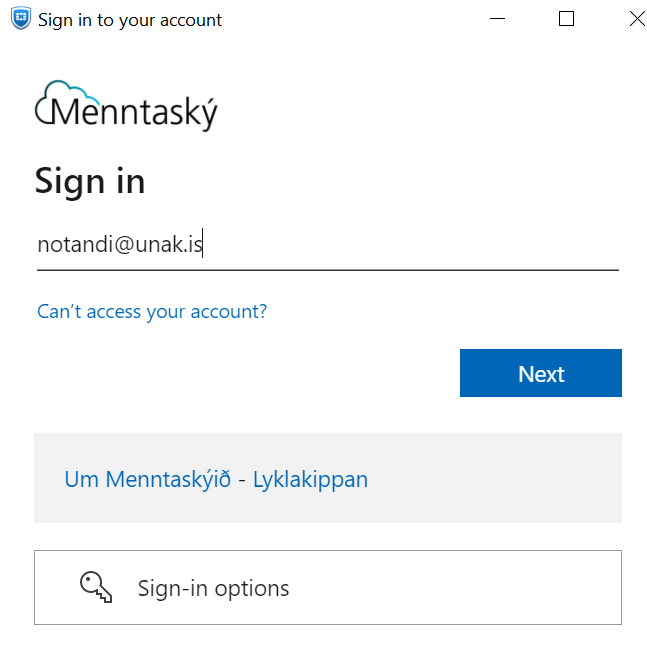
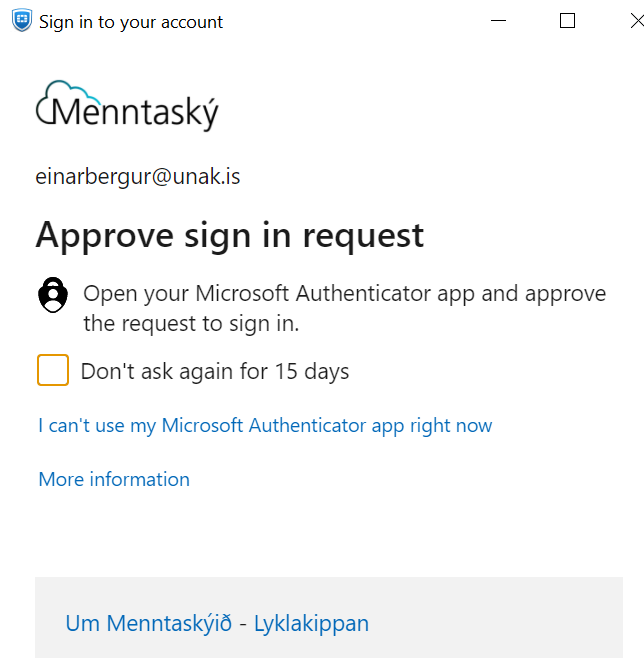
Click Save Þá er hægt að ýta á SAML Login, sem opnar nýjan innskráningar glugga merktan Menntaský, þar setur þú skráir inn netfangið þitt, lykilorð og síðan samþyggja tveggja þátta auðkenni.
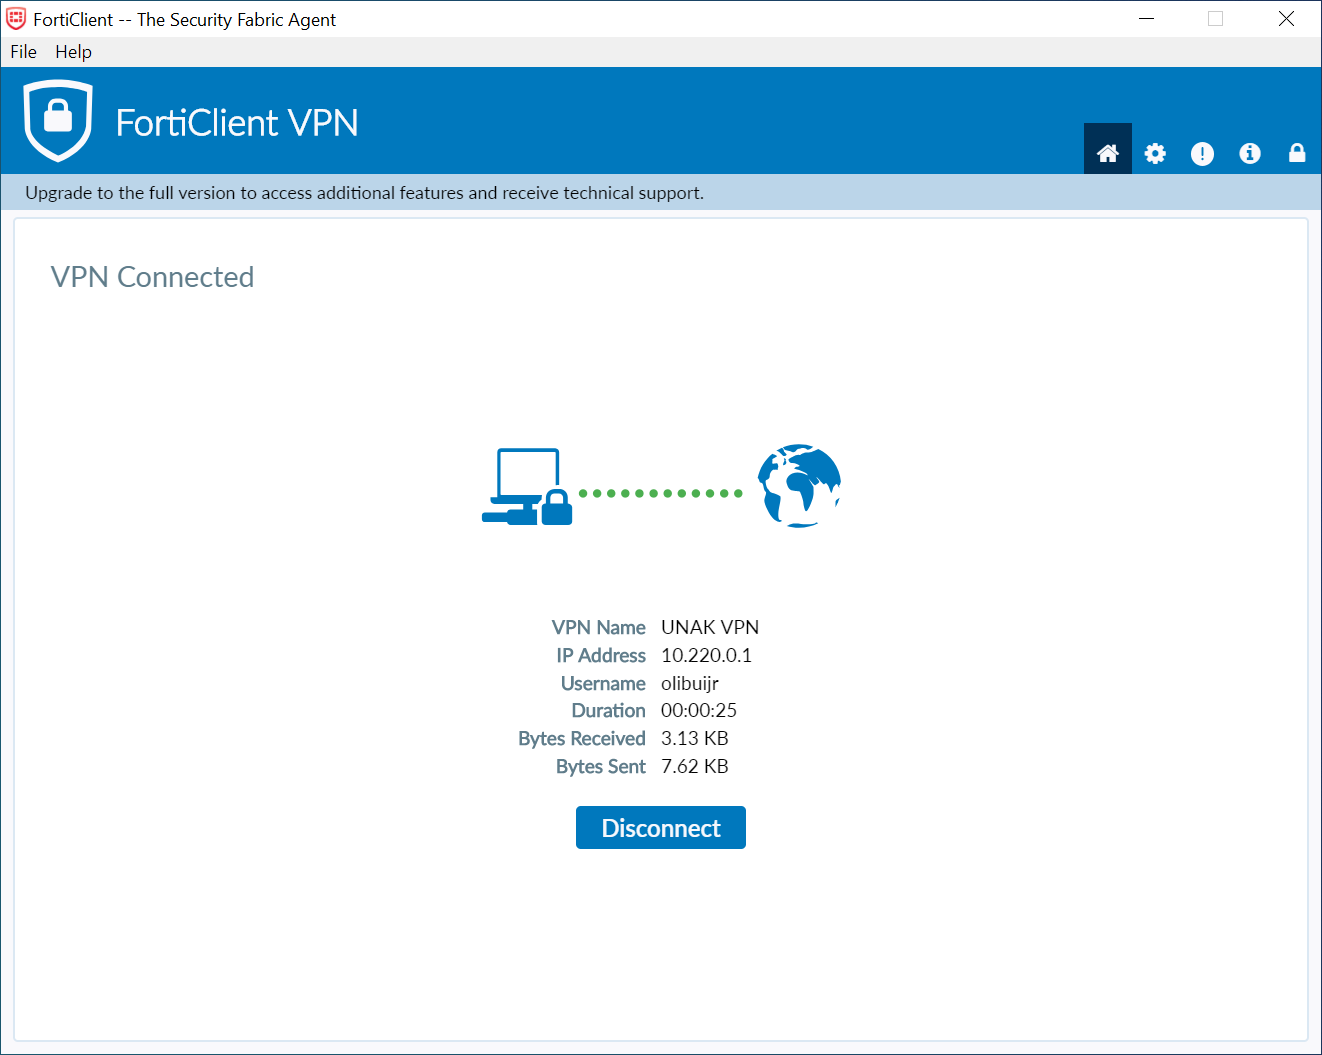
Now you can click SAML Login, that will prompt open a new sign in window for Menntaský, type your email address, then your password and finally approve in the autthendicator app. 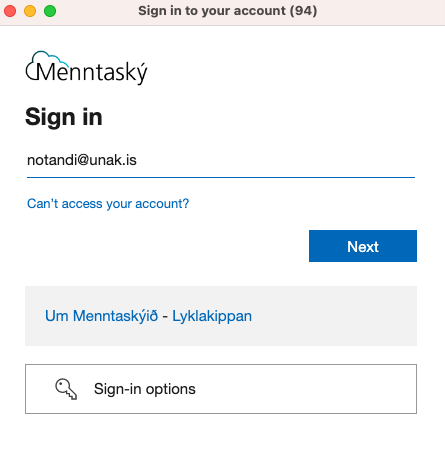 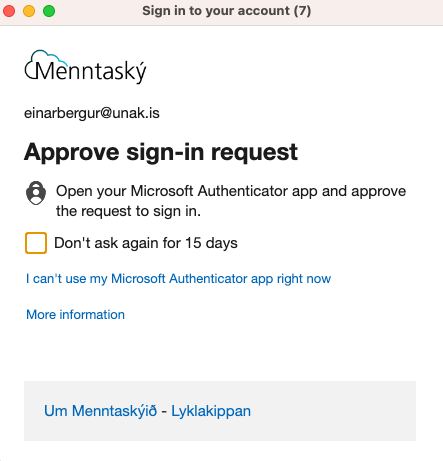 Ef allt er eðlilegt er VPN tenging nú komin á.
If everything is correctly done you should now be connected to the UNAK VPN 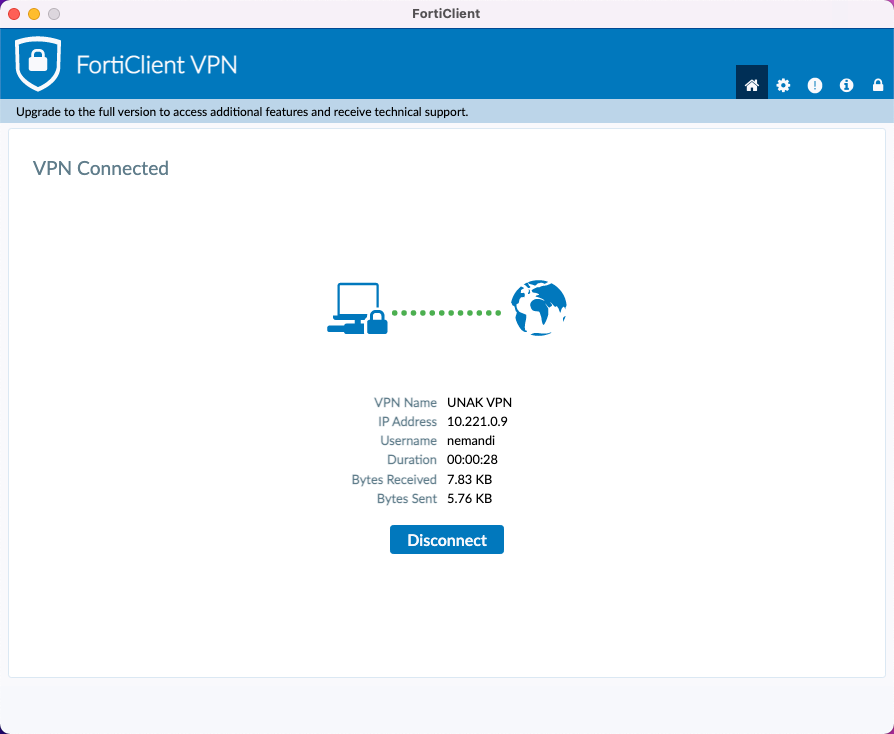 Virkar þetta ekki? / Doesn’t work?
Gæti verið að þú hafir óvart smellt á Don´t allow í upphafi þegar þú settir forritið upp?
Could it be that you accidentaly clicked Don’t allow when prompted to allow FortiTray in the setup pricess Til þess að komast að því / Find out: Farðu í System Preferences > Security & Privacy. / Go to System Preferences > Security & Privacy Smelltu á Allow takkann neðst þar sem stendur System software from application "FortiTray" was blocked from loading.
Click Allow at the bottom of the window where it says System software from application "FortiTray" was blocked from loading.
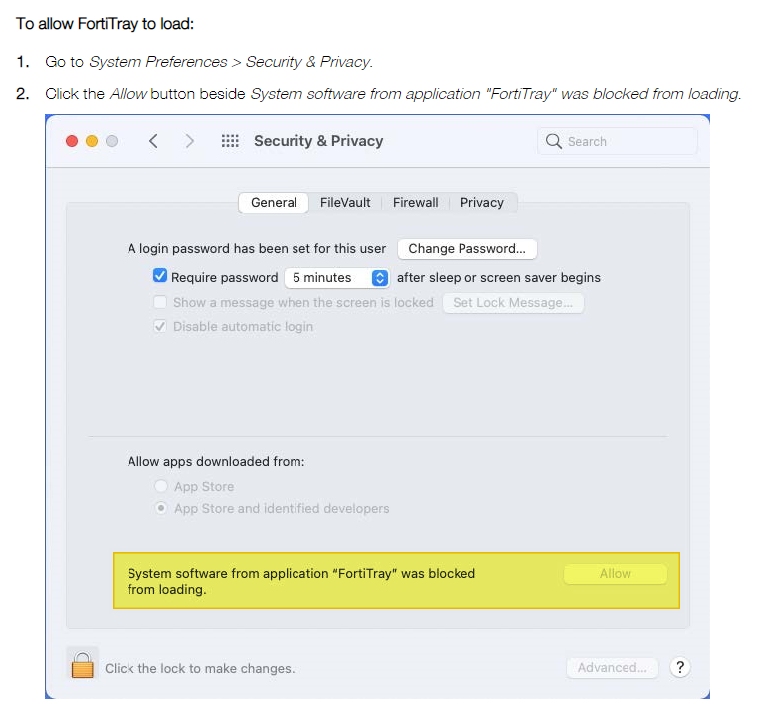
Ef þessi skilaboð eru sjáanleg neðst ætti að vera hægt að tengjast eftir að smellt er á “Allow“
|